What to Do in a Dental Emergency (Before You See the Dentist)

Introduction

A dental emergency can strike at any moment, often when you least expect it. Whether it is a sharp, searing toothache that awakens you in the middle of the night, a sudden blow to the face during a sporting event that knocks out a front tooth, or the distressing realization that a piece of your tooth has broken off while eating, these situations are frightening and painful. In moments of panic, it is easy to make mistakes that can compromise the long-term outcome. However, understanding exactly what to do in those critical minutes before you can reach a dentist can be the difference between saving a tooth and losing it permanently. This guide provides clear, step-by-step instructions for the most common dental emergencies so you can act quickly and effectively when every second counts.

Knocked-Out Tooth (Avulsion): The Race Against Time

A knocked-out tooth is the most time-sensitive dental emergency. If you act within 30 to 60 minutes, there is an excellent chance that the tooth can be reimplanted successfully. Time is of the essence because the cells on the root surface of the tooth begin to die as soon as they are exposed to air. When you find the tooth, pick it up very carefully by the crown, which is the white, chewing surface. Never touch the root of the tooth; the delicate periodontal ligament cells on the root are vital for successful reattachment.

If the tooth is dirty, gently rinse it with milk or a saline solution (salt water). Do not scrub the tooth or use tap water, as tap water is often chlorinated and can damage the root cells. Do not use soap or chemicals. Once it is clean, the best option is to try to reinsert it into the socket immediately. Gently push the tooth into the socket with your fingers or bite down gently on a clean cloth or gauze to hold it in place. If you cannot reinsert the tooth, the next best option is to place it in a container of milk. Milk provides the ideal environment for the root cells because it has the right pH and contains proteins that keep the cells alive. If milk is not available, place the tooth inside your cheek (if you are conscious and old enough not to swallow it) or in a cup of saliva. Do not let the tooth dry out.

Broken or Chipped Tooth: Immediate Steps

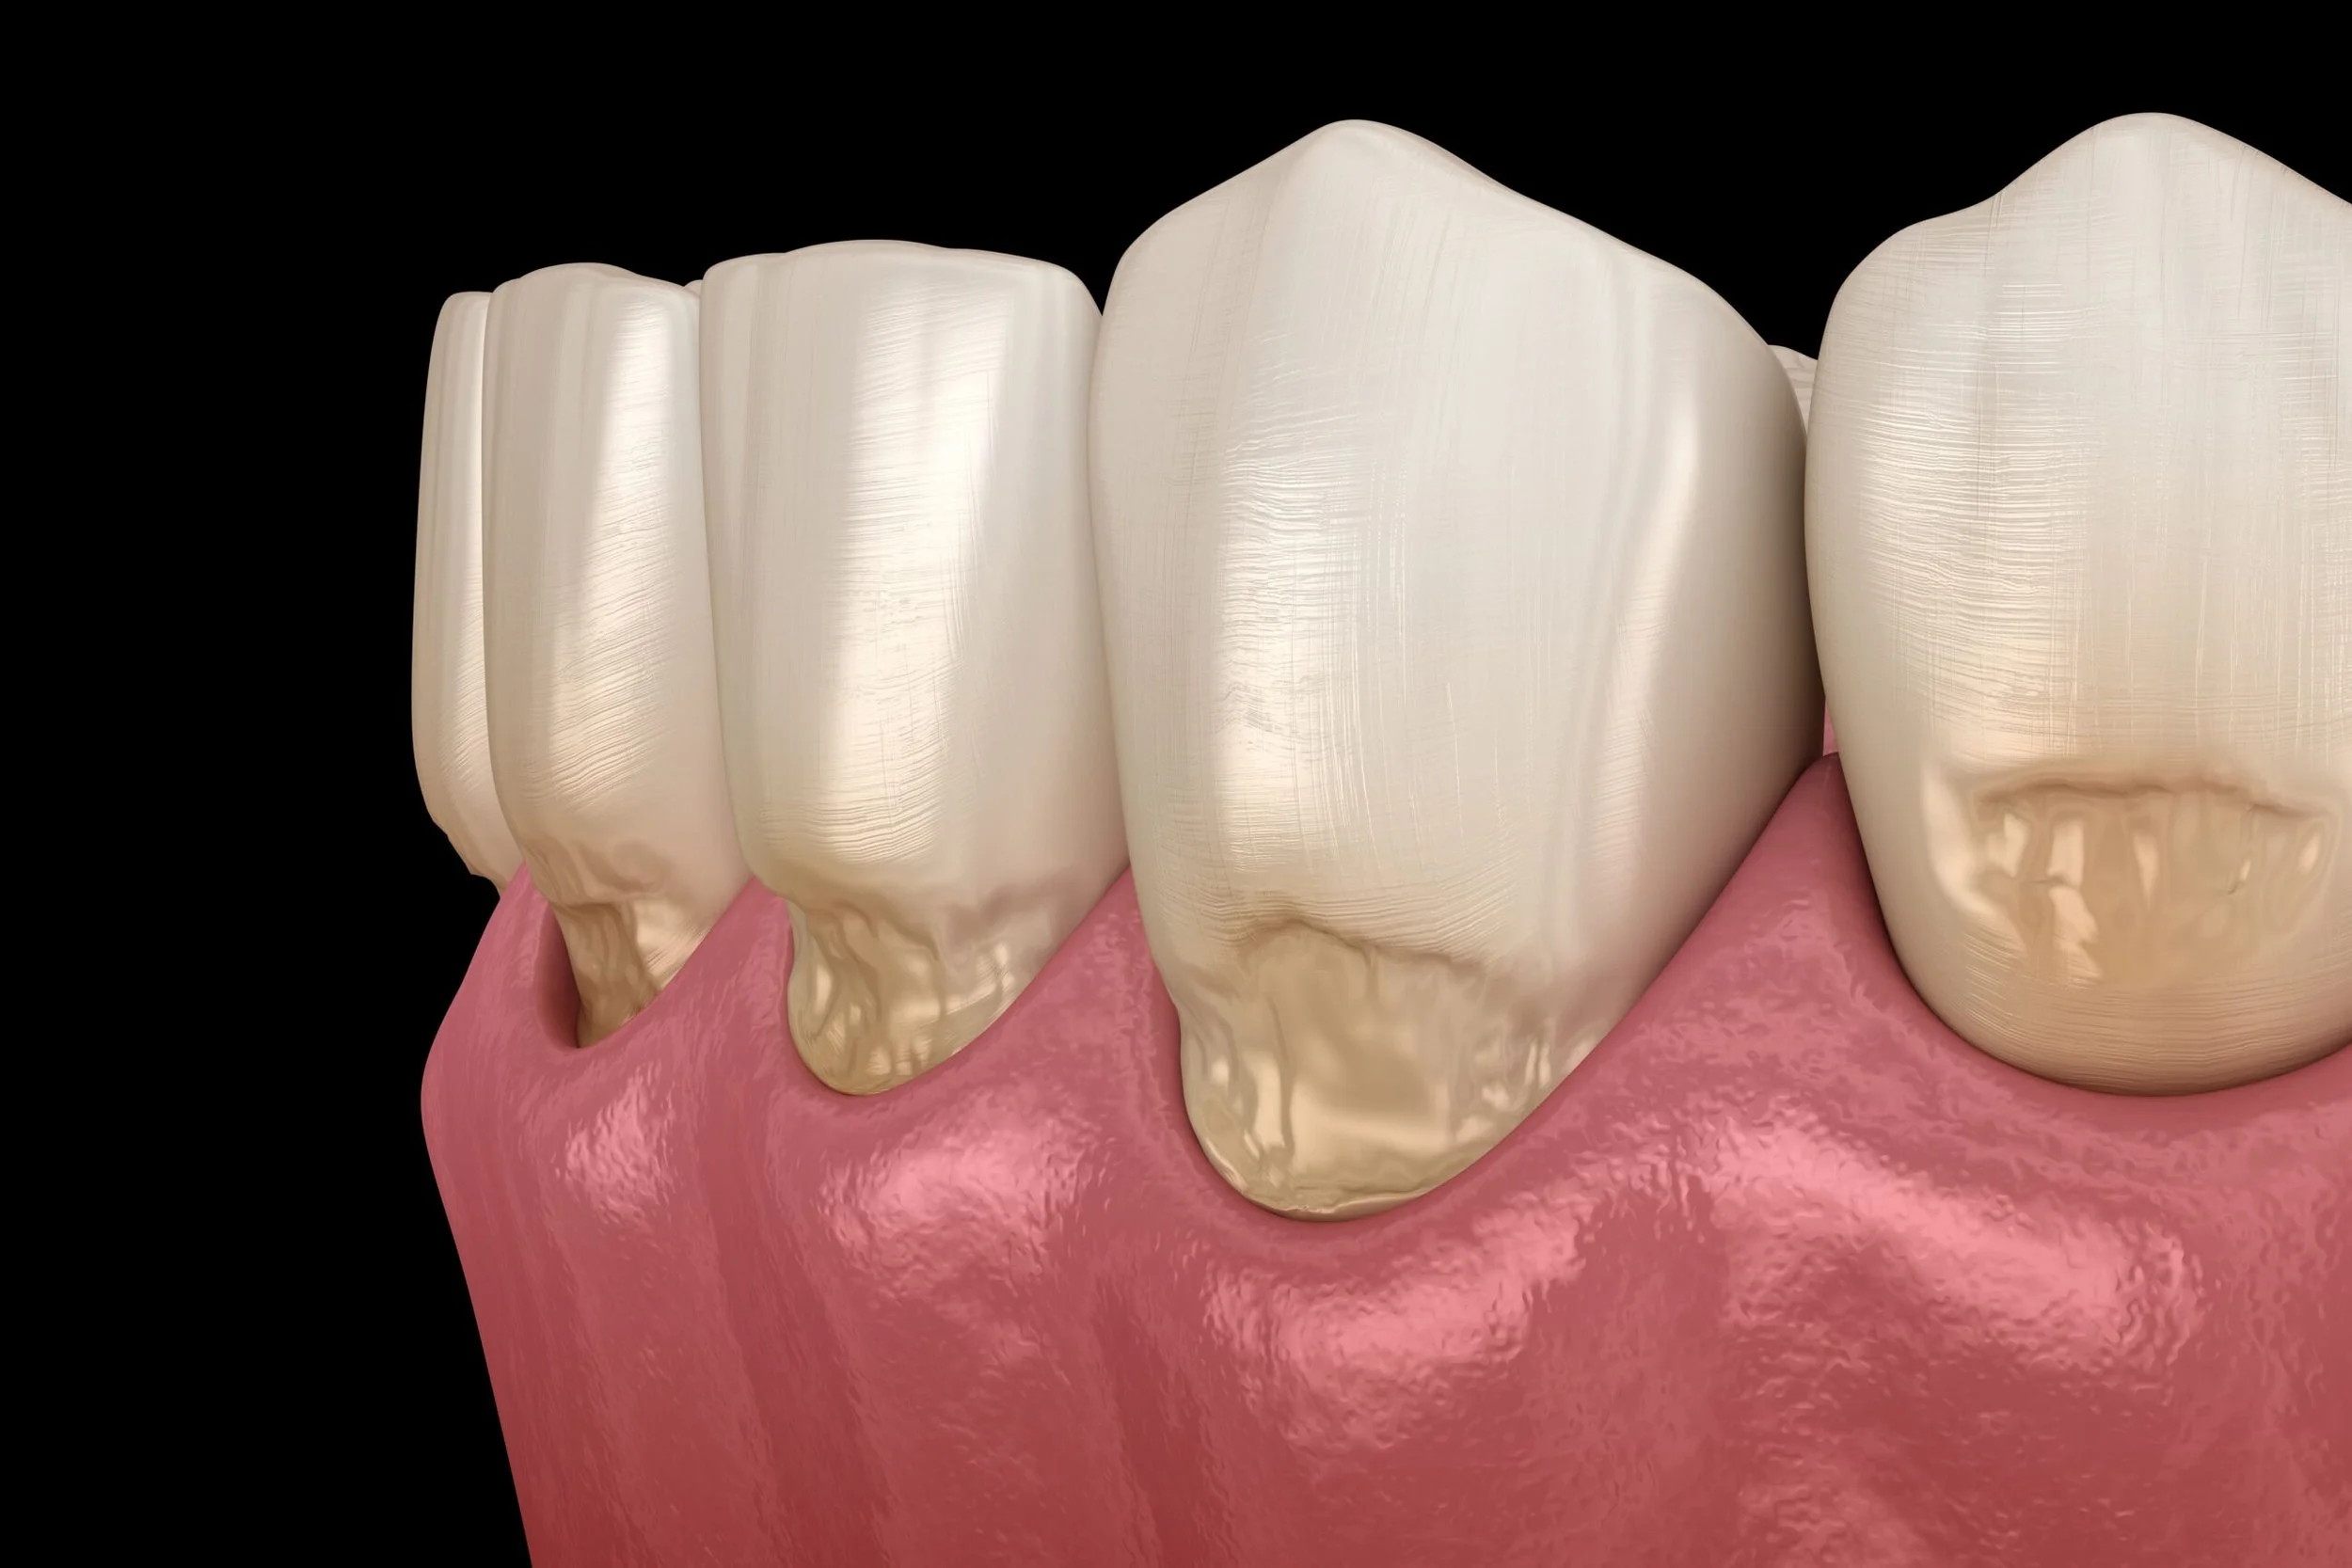
A chipped or broken tooth is a common dental emergency that can occur from biting down on a hard object, trauma, or even untreated decay. The severity of the break determines the urgency and the approach. If you have a small chip, it may be less urgent, but you should still see a dentist as soon as possible to prevent sharp edges from cutting your tongue or cheeks. If the break is large and exposes the nerve, you will experience significant pain and sensitivity.

First, rinse your mouth with warm salt water to clean the area. If there is any bleeding, apply pressure with a piece of sterile gauze until the bleeding stops. Apply a cold compress to the outside of your cheek or lip to reduce swelling and relieve pain. If you can find the broken piece of the tooth, store it in milk or water and bring it with you to the dentist; in some cases, the piece can be bonded back onto the tooth. Take over-the-counter pain relief if needed, but do not place aspirin directly on the tooth or gum, as it can cause chemical burns. For a minor chip, your dentist can smooth the edges or use bonding to restore the tooth. For a significant break, you may need a crown or root canal treatment.

Severe Toothache: Identifying the Source

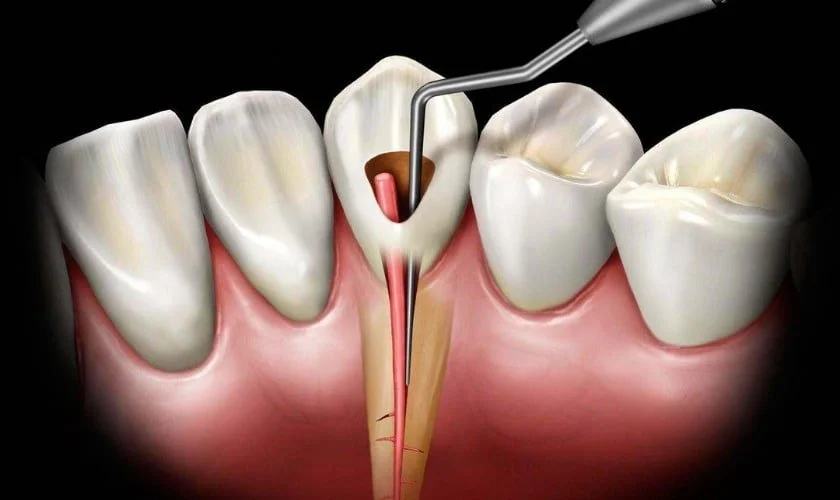
A severe toothache can be debilitating. The pain may be constant, throbbing, or triggered by hot, cold, or sweet foods. The most common cause is deep decay that has reached the nerve of the tooth, known as pulpitis. Another common cause is an abscess, which is a pocket of pus at the root of the tooth resulting from a bacterial infection. Abscesses are serious and require prompt treatment with antibiotics and often root canal therapy.

Start by gently flossing around the affected tooth. Sometimes, pain is caused by food trapped between teeth, and removing it resolves the discomfort. Rinse your mouth with warm salt water to clean the area and draw out some of the infection. Take over-the-counter pain medication like ibuprofen or paracetamol. Do not apply heat to the outside of your jaw, as heat can draw more blood to the area and worsen the swelling. Apply a cold compress instead. Avoid eating or drinking anything very hot or cold. If you notice swelling in your face, fever, or difficulty swallowing or breathing, seek emergency medical attention immediately, as these could be signs of a spreading infection.

Lost Filling or Crown

Losing a filling or crown can be alarming, especially if the exposed tooth is sensitive to temperature or air. The most important thing to do is protect the exposed tooth. You can buy temporary filling material or dental cement at a pharmacy to cover the area temporarily. If you lose a crown and it is intact, you may be able to temporarily reattach it using dental cement or even a dab of toothpaste or denture adhesive. Do not use super glue or any household adhesive.

Clean the inside of the crown thoroughly before reattaching it. Place the crown back onto the tooth and bite down gently to ensure it is seated properly. Do not eat sticky or hard foods on that side of your mouth. See your dentist as soon as possible for a permanent recementation or a new crown. Leaving the tooth exposed can lead to further damage or infection.

Broken Orthodontic Appliance (Braces or Retainers)

If a bracket becomes loose or a wire breaks, it can be uncomfortable and irritating to your cheeks and gums. If a wire is poking into your soft tissue, you can use a pencil eraser to gently push the wire into a more comfortable position. Alternatively, use a small piece of orthodontic wax to cover the sharp end of the wire. Do not cut the wire, as you might swallow the piece.

If a bracket is loose but still attached to the wire, leave it in place. If it comes off completely, store it and bring it to your orthodontist. A loose band or wire should be seen by your orthodontist as soon as possible, but it is rarely a life-threatening emergency. Avoid eating hard, sticky, or chewy foods to prevent further damage to the appliance.

Abscess and Swelling

An abscess is an infection that can occur at the root of a tooth or in the space between the tooth and the gum. The pain is often severe and throbbing. The infection can cause swelling in your face, fever, and a bad taste in your mouth. An abscess will not heal on its own and requires professional treatment. The infection can spread to other parts of your body, which can be life-threatening.

Rinse your mouth several times a day with warm salt water to help draw out the pus. Do not poke or try to drain the abscess yourself. Take over-the-counter pain medication to manage discomfort. See your dentist urgently. They will likely prescribe antibiotics and may need to drain the abscess or perform a root canal. If the swelling is severe enough to interfere with breathing or swallowing, go to the emergency room immediately.

Prevention

While you cannot prevent every dental emergency, many can be avoided with good habits. Wear a mouthguard when playing contact sports. Avoid chewing on hard objects like ice, popcorn kernels, or pens. Do not use your teeth to open packaging. Maintain regular dental checkups to catch cavities before they become painful emergencies. Treating a small cavity is far less stressful than dealing with a toothache or abscess.

Conclusion

A dental emergency is a stressful experience, but knowing how to respond can save a tooth and prevent complications. Stay calm, follow the appropriate steps for your specific emergency, and contact your dentist as soon as possible. Having a dental first aid kit with gauze, a small container, dental wax, and pain relievers is a good idea. Remember, in a knocked-out tooth, every minute counts. Prompt and appropriate action is the key to preserving your smile.

Book online at https://painfreedentistsydney.com.au/
Call us at 9558 8988
Email us at info@painfreedentistsydney.com.au


Dental Implants: The Complete Beginner's Guide

Introduction

Losing a tooth can be a deeply unsettling experience. Whether it is the result of an accident, advanced decay, or gum disease, the loss of a natural tooth affects more than just your appearance. It can impact your ability to chew, your speech, and even the shape of your face. For decades, the standard solutions for missing teeth were bridges and dentures, both of which have significant drawbacks. In recent decades, however, dental implants have revolutionized restorative dentistry, offering a solution that looks, feels, and functions remarkably like a natural tooth. If you are considering dental implants, this comprehensive guide will walk you through everything you need to know about the procedure, the benefits, and what to expect along the way.

What Exactly Is a Dental Implant?

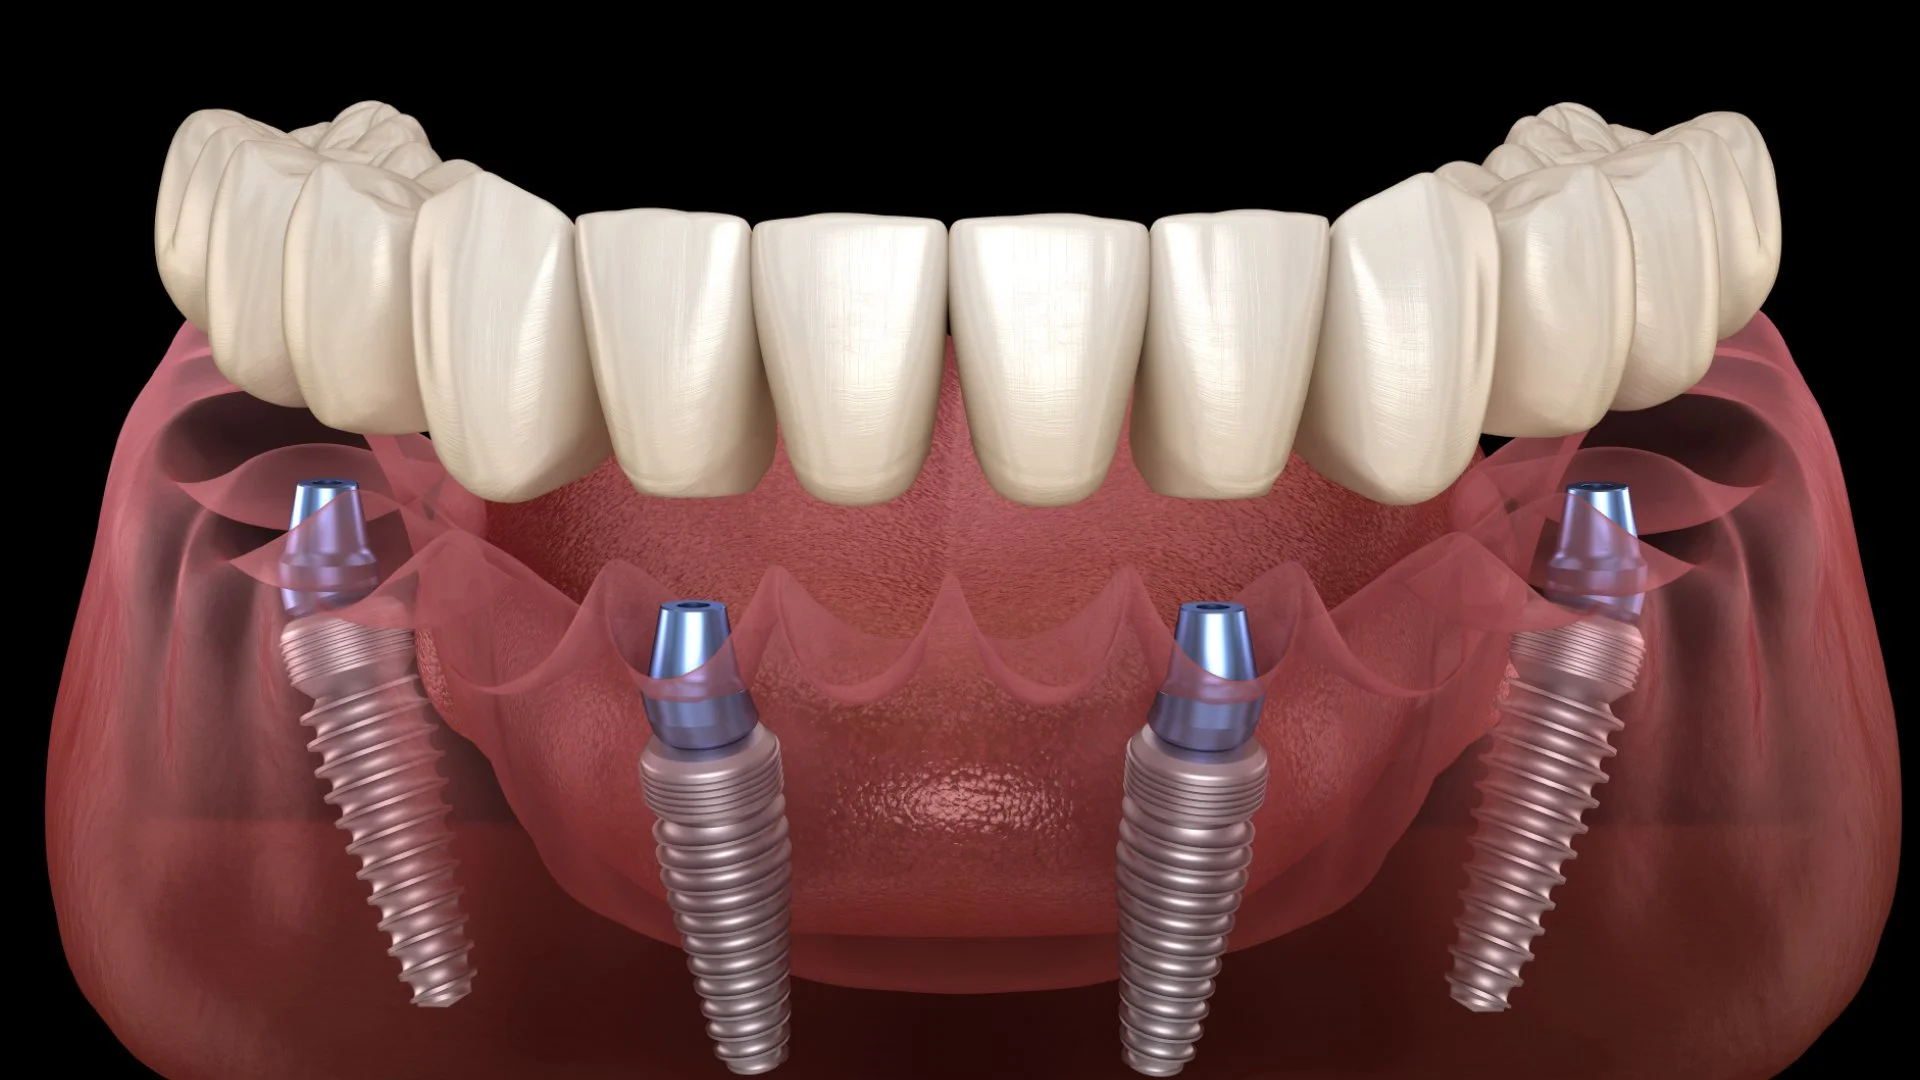
A dental implant is essentially a prosthetic tooth root. It is a small, screw-like post typically made of titanium, a biocompatible metal that has the unique ability to fuse with living bone tissue. This process of fusion is known as osseointegration, and it is the key to the implant's remarkable stability and longevity. Unlike a bridge, which relies on adjacent teeth for support, or a denture, which sits on top of the gums, an implant stands independently, anchored securely within the jawbone.

The implant itself is only one component of the restoration. The entire structure consists of three parts: the titanium post that is placed into the bone, an abutment that is attached to the top of the post, and the dental crown that is placed on top of the abutment. The crown is custom-made to match the color, shape, and size of your natural teeth, ensuring a seamless and natural-looking result. When all three components are in place, the implant functions just like a natural tooth, allowing you to eat, speak, and smile with confidence.

The Surgical Procedure: Step by Step

The dental implant process is typically divided into several stages, spread over several months to allow for proper healing and osseointegration. The first step is a comprehensive evaluation. Your dentist or oral surgeon will take X-rays and possibly a CT scan to assess the quality and quantity of bone in your jaw. They need to ensure that there is enough bone to support the implant. If there is insufficient bone, you may require a bone graft to build up the area before the implant can be placed.

On the day of the surgery, you will receive local anesthesia to numb the area. If you have dental anxiety, sedation options are available to help you relax. The surgeon will make an incision in the gum tissue to expose the underlying bone. A series of drills of increasing diameter are used to create a hole in the bone that matches the size of the implant post. The implant is then carefully screwed into place. The gum tissue is sutured closed over the implant, leaving the implant completely covered or with a healing cap protruding slightly. The surgery itself usually takes one to two hours for a single implant.

The Healing Phase: Waiting for Osseointegration

After the implant is placed, a critical healing phase begins. Over the next three to six months, the titanium post will fuse with the surrounding bone through the process of osseointegration. During this time, the implant is not yet ready to support a permanent crown. You will need to eat soft foods and be very careful to avoid putting pressure on the implant site. The bone cells grow into the microscopic pores of the titanium surface, creating a strong, biological bond. This is what makes dental implants so durable; the bone actually grows around and into the implant, anchoring it just as it would a natural tooth root.

Some patients may receive a temporary crown or a partial denture during this healing period for aesthetic purposes. However, these temporary restorations are designed to be easily removed and do not place any significant load on the implant. It is essential to maintain excellent oral hygiene during this phase to prevent infection, which could compromise the osseointegration process. The success of the implant depends heavily on the formation of a healthy, infection-free environment around the healing site.

The Abutment and Crown Placement

Once the implant has fully integrated with the bone, you will return to your dentist for the second part of the procedure. The surgeon will make a small incision to expose the top of the implant and attach an abutment. The abutment is a connector piece that will hold the final crown. In some cases, the abutment is placed at the same time as the implant, but more often it is done as a separate step after osseointegration is complete. After the abutment is attached, impressions of your teeth and the implant area are taken. These impressions are sent to a dental laboratory, where your custom crown is fabricated.

The laboratory typically takes two to three weeks to create the crown. During this time, you may be given a temporary crown to cover the abutment. When the permanent crown is ready, you will return for a final appointment. The dentist will check the fit, color, and bite of the crown before permanently cementing or screwing it onto the abutment. The restoration is now complete. The implant is indistinguishable from your natural teeth, and you can resume your normal eating habits immediately.

Benefits of Dental Implants Over Other Tooth Replacements

Dental implants offer several distinct advantages over traditional bridges and dentures. First and foremost, they preserve jawbone. When a tooth is lost and not replaced, the bone that supported that tooth begins to resorb, or shrink, due to lack of stimulation. This bone loss can alter the shape of your face, making you appear older. Because an implant stimulates the bone just like a natural root, it prevents this bone resorption and maintains your facial structure.

Second, implants do not compromise adjacent healthy teeth. A traditional bridge requires the adjacent teeth to be ground down to support a fixed bridge. This damages perfectly healthy teeth. An implant is independent and does not require any modification of neighboring teeth. Third, implants provide superior chewing function. Dentures can slip and shift, making eating difficult and embarrassing. Implants are anchored securely in the bone, allowing you to eat anything you want without worry. Fourth, implants are extremely durable and can last a lifetime with proper care, making them a cost-effective long-term solution compared to dentures that need to be replaced every five to ten years.

Candidacy and Contraindications

Not everyone is an ideal candidate for dental implants. The most important factor is having adequate bone volume and density. If you have experienced significant bone loss, you may still be a candidate if you are willing to undergo a bone grafting procedure. Good overall health is also crucial. Conditions that impair healing, such as uncontrolled diabetes, autoimmune disorders, or a compromised immune system, may affect the success of the implant. Heavy smokers are also at higher risk for implant failure because smoking impairs blood flow to the gums and bones.

Certain medications, such as bisphosphonates used to treat osteoporosis, can interfere with bone healing and may preclude you from receiving implants. Age is generally not a barrier; many older adults successfully receive implants. A thorough medical and dental history review, along with imaging studies, will help your dental team determine whether you are a suitable candidate.

Caring for Your Dental Implant

One of the most appealing aspects of dental implants is that they do not require any special care beyond the routine maintenance you should already be practicing. You should brush twice a day with a soft-bristled toothbrush, floss daily, and visit your dentist for regular checkups and cleanings. However, because implant crowns are made of porcelain, they are not susceptible to decay. The real risk lies with the gums and bone surrounding the implant. Peri-implantitis is an inflammatory condition similar to gum disease that can affect the tissues around an implant. If left untreated, it can lead to bone loss and implant failure.

To prevent peri-implantitis, you need to keep the area around the implant exceptionally clean. Your dentist may recommend special interdental brushes or a water flosser to reach the nooks and crannies around the implant. Regular professional cleanings are essential, as your hygienist has specialized instruments to clean around implants without scratching the surface. With proper care, your implant can remain functional and aesthetically pleasing for decades, making it one of the most reliable and successful procedures in modern dentistry.

Conclusion

Dental implants represent a remarkable advancement in restorative dentistry, offering a permanent, stable, and natural-looking solution for missing teeth. The procedure is extensive, involving surgery and a healing period of several months, but the long-term benefits far outweigh the temporary inconvenience. By preserving jawbone, protecting adjacent teeth, and restoring full chewing function, implants not only improve your smile but also your overall quality of life. If you are considering implants, schedule a consultation with a qualified implant dentist to determine if you are a candidate and to discuss a treatment plan tailored to your specific needs.

Book online at https://painfreedentistsydney.com.au/
Call us at 9558 8988
Email us at info@painfreedentistsydney.com.au

Teeth Whitening: What Actually Works and What's Just Hype

Introduction

In today's image-conscious world, a bright, white smile has become synonymous with health, vitality, and success. It is no wonder, then, that the teeth whitening industry has exploded into a multi-billion dollar market with an overwhelming array of products, treatments, and viral social media hacks. Walk down any pharmacy aisle or scroll through your Instagram feed, and you will be bombarded with promises of a dazzling smile in just days using everything from charcoal powders to LED lights and strawberry pastes. But how much of this actually works? Separating dental fact from marketing fiction is essential if you want to achieve a brighter smile without damaging your enamel or wasting your money.

The Science of Tooth Stains

Before you can choose a whitening method, it helps to understand what causes tooth discoloration in the first place. Tooth stains generally fall into two categories: extrinsic and intrinsic. Extrinsic stains affect the outer layer of the tooth, the enamel. These stains are caused by lifestyle habits such as drinking coffee, tea, red wine, or dark sodas, as well as smoking or chewing tobacco. These surface stains are often responsive to over-the-counter whitening products and even certain toothpastes with mild abrasives.

Intrinsic stains, on the other hand, occur deeper within the tooth structure, in the dentin layer beneath the enamel. These stains can be caused by aging, trauma to the tooth, certain medications like tetracycline antibiotics taken during childhood, or excessive fluoride exposure during development. Intrinsic stains are much harder to treat and often require professional-strength whitening agents or even veneers to correct. Understanding the nature of your stains is the first step in determining whether at-home treatments will be sufficient or whether you need professional intervention.

Over-the-Counter Whitening Products: What They Can and Cannot Do

The most common over-the-counter whitening options include whitening toothpastes, strips, gels, and LED kits. Whitening toothpastes work primarily through mechanical abrasion. They contain mild abrasive particles like silica that polish the surface of the teeth to remove surface stains. Some also contain small amounts of a chemical agent like hydrogen peroxide, but because the concentration is low and the contact time is limited, the whitening effect is minimal. Whitening toothpastes can be a good maintenance tool but are unlikely to produce dramatic results.

Whitening strips and gels are a step up. These products contain a bleaching agent, usually hydrogen peroxide or carbamide peroxide, in concentrations ranging from about 6% to 14%. When applied to the teeth, the peroxide molecules penetrate the enamel and break down the complex organic molecules that cause discoloration. The effectiveness of these products depends on the concentration of the active ingredient, the length of time they are worn, and how consistently they are applied. Many people achieve noticeable results after two to three weeks of daily use. However, these strips and gels do not cover the entire tooth surface evenly; they often miss the crevices between teeth and the areas near the gumline, which can lead to uneven whitening.

LED teeth whitening kits have become immensely popular. These kits usually involve applying a peroxide gel and then exposing your teeth to an LED light for a specified period. The science behind this is mixed. Some studies suggest that blue LED light can accelerate the oxidation process of peroxide, potentially speeding up whitening. However, many dental professionals argue that the LED lights in at-home kits are not powerful enough to make a significant difference, and the whitening effect is primarily due to the peroxide gel itself. In other words, you might get the same results by just leaving the gel on without the light.

The Danger of Viral Social Media Hacks

The internet is full of well-meaning but potentially dangerous teeth whitening advice. Two of the most problematic trends are activated charcoal and baking soda. Activated charcoal is highly abrasive. While it may temporarily make teeth look whiter by scrubbing away surface stains, it does so by wearing down the enamel. Over time, this enamel erosion exposes the yellowish dentin underneath, making your teeth look yellower than they were to begin with. Furthermore, charcoal does not have any inherent whitening properties; it does not break down stain molecules like peroxide does. It is purely abrasive, and once the enamel is worn, it is gone forever.

Baking soda is similarly abrasive, although less so than charcoal. Some people mix baking soda with lemon juice or strawberries, creating an acidic paste that attacks the enamel. Acid erodes the mineral content of your teeth, making them more porous and prone to staining. The combination of acid and abrasion is a recipe for disaster, leaving you with sensitive, thinned enamel that looks translucent. The only over-the-counter products that actually bleach teeth are those containing peroxide compounds. If a product does not list a peroxide ingredient, it is not chemically whitening your teeth; it is just polishing them.

Professional Whitening: In-Office and Take-Home Trays

For those seeking significant, reliable results, professional whitening is the gold standard. In-office whitening, often referred to as Zoom or laser whitening, involves applying a high-concentration peroxide gel (usually 25% to 40%) directly to the teeth. This gel is often activated by a special heat or light source. The dentist protects your gums and soft tissues with a barrier to prevent chemical burns. The procedure takes about an hour and can lighten teeth by several shades in a single session. The results are immediate and dramatic. However, the high concentration of peroxide means that tooth sensitivity is a common side effect, though it usually subsides within a few days.

Another professional option is custom take-home trays. Your dentist takes an impression of your teeth and creates a set of customized plastic trays that fit perfectly over your teeth. You are given a professional-grade whitening gel, usually with a lower concentration (10% to 22%) than the in-office treatment. You wear the trays for a prescribed amount of time each day, typically for one to two weeks. This method is more gradual but can achieve results comparable to in-office whitening. The custom trays ensure that the gel is distributed evenly across all surfaces of your teeth, avoiding the uneven results common with over-the-counter strips.

Managing Side Effects and Maintaining Results

Tooth sensitivity is the most common side effect of whitening, regardless of the method used. This occurs because the peroxide opens up the pores of the enamel, exposing the nerve endings inside the dentin. To manage sensitivity, use a toothpaste formulated for sensitive teeth, which contains potassium nitrate to block the nerve pathways. Avoid extremely hot or cold foods and drinks for a few days after whitening. Many dentists also recommend applying a desensitizing gel or taking an anti-inflammatory medication like ibuprofen before the procedure.

Maintaining your whitened smile requires vigilance. Your teeth are most susceptible to staining in the first 48 hours after whitening because the enamel pores are still open. During this "porous period," adhere to what is known as the "white diet": eat only white or colorless foods like chicken, rice, pasta, bananas, and egg whites. Absolutely avoid coffee, tea, red wine, dark sodas, berries, and tomato sauce. After the 48-hour window, you can gradually reintroduce these foods, but do so with caution. Use a straw for dark beverages to minimize contact with your front teeth, and rinse your mouth with water after consuming staining agents. Touching up your smile with an at-home maintenance gel a few times a year can help keep your teeth looking bright.

Conclusion

Achieving a whiter smile is entirely possible, but it requires a realistic understanding of what different products and procedures can actually deliver. Over-the-counter strips and gels can produce moderate, gradual results for surface stains. In-office and custom take-home treatments offer dramatic, reliable results for more stubborn discoloration. Viral social media hacks like charcoal, baking soda, and acidic fruit pastes are dangerous and should be avoided at all costs. The health of your enamel is far more important than the shade of your teeth. Consult with your dentist to determine the safest and most effective whitening strategy for your specific needs, and you can smile with confidence knowing you have protected your teeth while enhancing your appearance.

Book online at https://painfreedentistsydney.com.au/
Call us at 9558 8988
Email us at info@painfreedentistsydney.com.au